
Gitlab SSH Key: The Only Guide You'll Need

With 30 million estimated registered users, Gitlab is one of the most popular alternatives to Github thanks to its free self-hosted option, making it a great fit for developers who want more control over their Git repositories and devops operations.
While the ability to own your data brings key security benefits in terms of privacy and data storage, you still need to secure your Gitlab repositories: for this reason, Onboardbase proposes a Gitlab integration to secure how you access your repositories using a Gitlab SSH key. To make it easy for you to do that, we decided to write the following article to describe how to use Gitlab’s SSH feature with security in mind.
What’s A Gitlab SSH Key
A Gitlab SSH key is used to securely communicate with Gitlab using the SSH protocol.
SSH (Secure Socket Shell) is a communication protocol designed to protect transmitted data on insecure networks using asymmetric encryption methods like RSA. An asymmetric encryption system like SSH uses a public key for encryption and a private key for decryption. You also need not one but two keys to interact with Gitlab via command line.
Why You Need SSH Keys For Gitlab
Authentication / authorization is a must-have to collaborate on git repositories―you need to know who is who and who does what. Gitlab uses a SSH key pair to identify a single user, because each pair has to be unique to be secure and no two generated keys can be the same.
While HTTPS authentication using a username and a password appears easier and comfortable, SSH is more secure by design: you don’t have to manage passwords, because if you lose a key the best practice is to simply generate a new one. You also never have to remember your keys because they are stored in files and processed by your operating system without you having to do anything which greatly reduces the possibility of leaking your credentials.
How To Securely Manage Your Gitlab SSH Key Pair
The process can be broken down in 4 steps:
- Create an SSH key pair using ssh-keygen
- Copy the value of the public SSH key to Gitlab
- Copy the value of the private SSH key to Onboardbase
- Use SSH to connect to Gitlab
1. Generate an SSH key pair with ssh-keygen
Gitlab proposes several types of keys depending on which encryption method you prefer: RSA, ED25519, ED25519_SK, and ECDSA_SK. For the use case of this article, we recommend using ED25519.
ED25519 is more secure than RSA or ECDSA, and the _SK version of the article doesn’t bring features that are relevant to this article (hardware key vault support).
We use the ssh-keygen command to generate a SSH key pair:
ssh-keygen -t ed25519It is advised to specify a passphrase for maximum security.
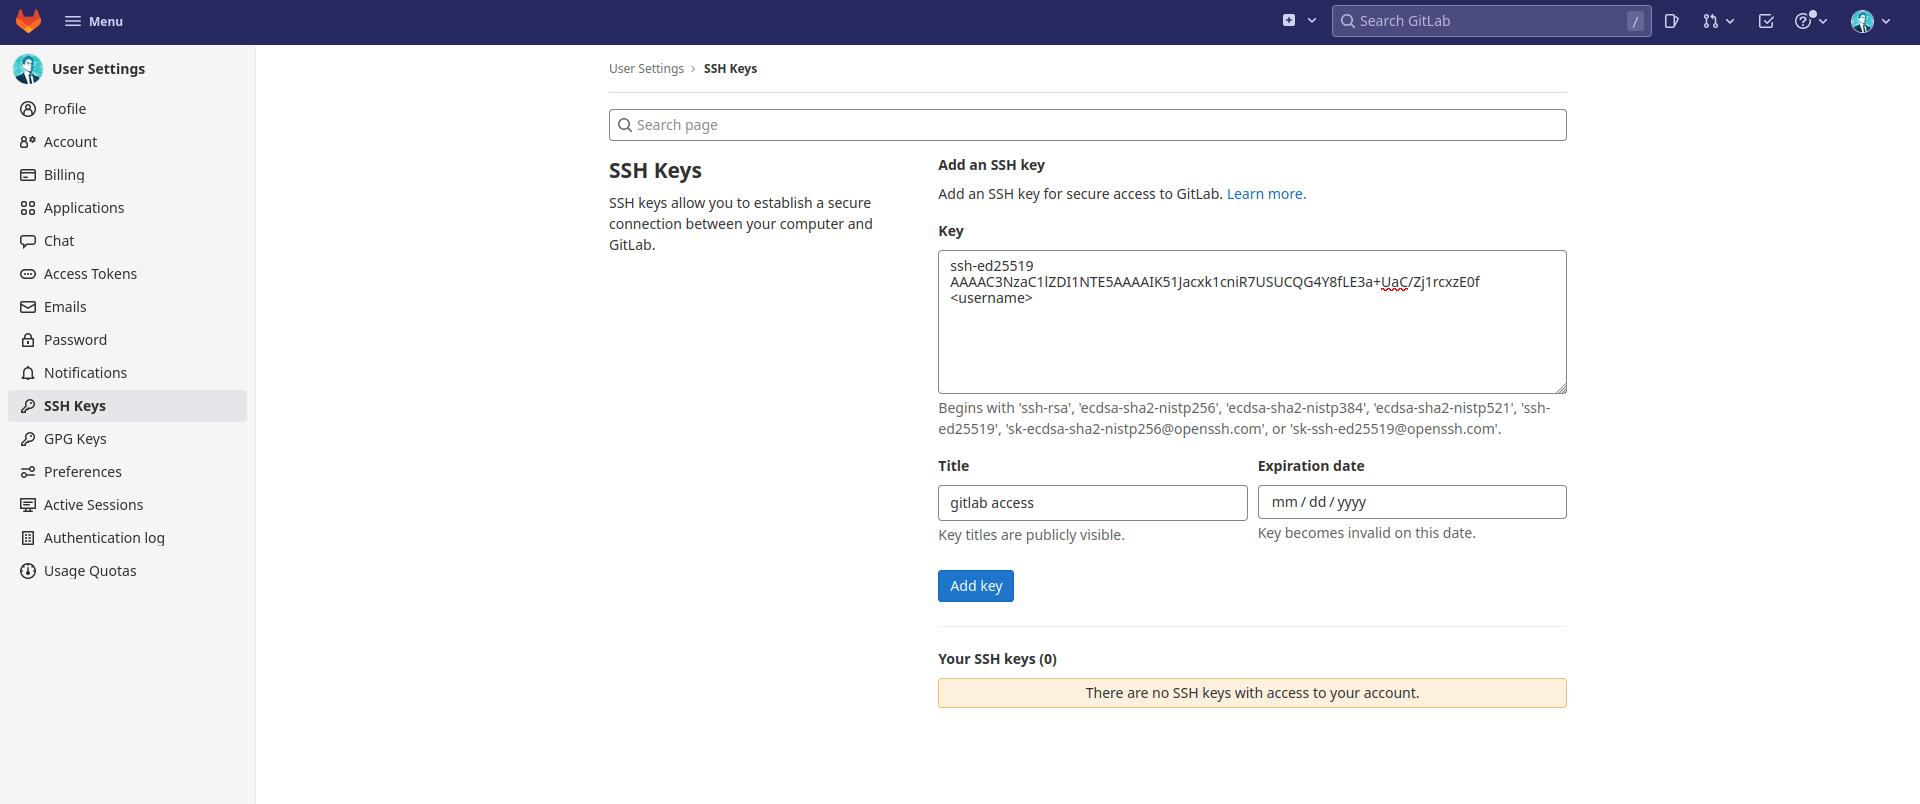
2. Add an SSH key to Gitlab
Your SSH keys are now ready to be used and you just need to configure Gitlab to recognize your public key.
Head to your gitlab.com account’s User settings, then switch to the SSH keys tab and copy/paste your public SSH key―the previously generated key file with the .pub extension―before pressing the Add Key button:
Your key pair is now operational and you can test it using the following ssh command:
$ ssh -T git@gitlab.com
The authenticity of host 'gitlab.com' can't be established.
ED25519 key fingerprint is SHA256:XXX.
This key is not known by any other names
Are you sure you want to continue connecting (yes/no/[fingerprint])? yes
Warning: Permanently added 'gitlab.com' (ED25519) to the list of known hosts.
Enter passphrase for key '/home/onboardbase/.ssh/id_ed25519':
Welcome to GitLab, @onboardbase!
3. Store your private SSH key on Onboardbase
You can do two things to make SSH easier and more secure to use.
First, you might have already noticed you are requested to enter your passphrase each time you use SSH. It’s a bit tedious, and it kind of defeats the purpose of not having to manage a password in the first place: you need to configure your ssh agent to remember your private key and its associated passphrase. Fortunately, it can be done with a command utility called ssh-add:
$ ssh-add
Enter passphrase for /home/onboardbase/.ssh/id_ed25519:
Identity added: /home/onboardbase/.ssh/id_ed25519 (onboardbase@onboardbase)
Just run the ssh command again and you will notice you don’t have to enter your passphrase anymore:
$ ssh -T git@gitlab.com
Welcome to GitLab, @onboardbase!
You won’t need your private key file anymore, so you might as well delete it. This is the second improvement point as well: removing the need for permanent files will make the whole process more secure.
Imagine this use case. As a developer, you’ll probably have loads of ssh keys to update manually if you need to switch terminals. What you can do instead is to use a secure vault like Onboardbase to automate the installation and backup of all your SSH keys.
First, add your private key to Onboardbase:
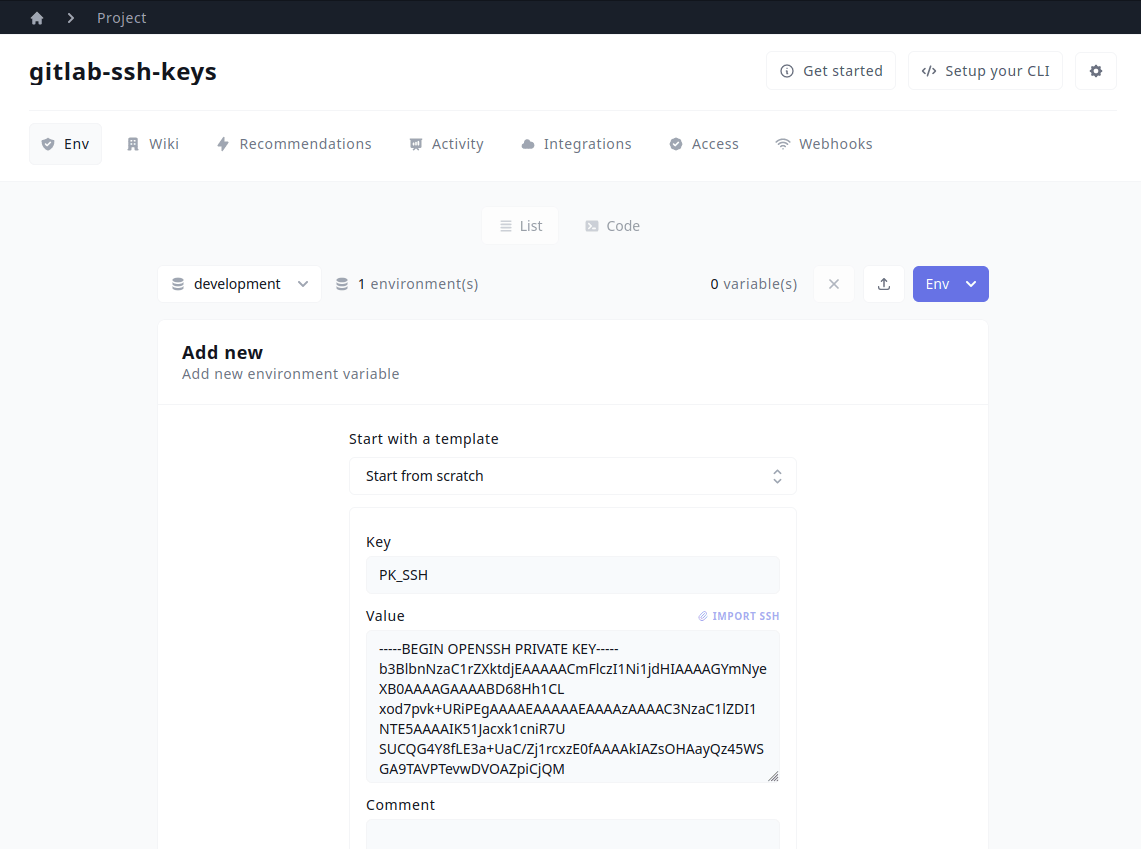
Then, use Onboardbase’s CLI to inject the private SSH key in a temporary file while we add it to our SSH agent:
# Setup Onboardbase
onboardbase login

# Retrieve SSH key
onboardbase run -c 'echo "$PK_SSH" > home/user/.ssh/gitlab' -p "gitlab-ssh-keys" -e "development"

# Add SSH key to the SSH agent
sudo chmod 600 /home/user/.ssh/gitlab #otherwise the key is unprotected
ssh-add /home/user/.ssh/gitlab

# Remove temporary key file
rm /home/user/.ssh/gitlab
You can now connect to Gitlab without storing your private keys anywhere obvious for attackers to find.
SSH Security Tips For Self-Hosted Gitlab
If you choose to self-host your own Gitlab server instance, you might want to go through some additional security best practices revolving around SSH like honeypots, disabling password login, and changing your default SSH port.
1. SSH Tarpit On Your Default Port
A SSH tarpit, or SSH honeypot, is a protection against hackers trying to brute-force your SSH port that sends garbage SSH headers to lock them up in an endless loop. Here is how to create one with endlessh:
git clone https://github.com/skeeto/endlessh
cd endlessh
make
./endlessh -p <your SSH port>
Whenever you’ll try to login using SSH, the server will become unresponsive and you’ll be stuck in a loop.
2. Change Your Default SSH Port
If you install a honeypot on the default SSH port, you’ll want to change it to be able to login. You can do this easily by modifying the configuration file located at /etc/ssh/sshd_config:
...
#   IdentityFile ~/.ssh/id_ed25519
Port 22 #change to another port
#   Ciphers aes128-ctr,aes192-ctr,aes256-ctr,aes128-cbc,3des-cbc
...
service ssh restart3. Disabling SSH Password Login
As we previously mentioned, using a key pair will always be safer than a traditional password login method. You can disable SSH password login in the config file:
PasswordAuthentication noOf course, you’ll need to define your public key on your remote server beforehand, using the ssh-copy-id command:
ssh-copy-id -i /home/onboardbase/.ssh/gitlab.pub <user>@<server domain>Use Onboardbase To Secure Your Gitlab SSH Keys
Securing your Gitlab repositories implies securing your SSH keys. But storing your private SSH key using a permanent file isn’t secure: you need tools like Onboardbase to store your SSH key pair in a secure vault you can access from anywhere while injecting your SSH keys as temporary files in your operating system at runtime.

Onboardbase is an app secret manager designed for developers to secure any development key in any workflow. A protected dashboard accessible from any terminal centralizes your app configurations, and a CLI easily integrates your secrets in all your git projects. You can get started for free in a minute without disrupting your current development workflow, it’s that simple!
Subscribe to our newsletter
The latest news, articles, features and resources of Onboardbase, sent to your inbox weekly