
Website Security Audit: Simple How-to, Checklist & Code

It takes 9 months on average for businesses to identify and contain a security breach, according to a study by IBM. Imagine what an attacker can do in 9 months! It’s even more frustrating knowing a simple solution like a regular website security audit check can drastically reduce associated risks.
At Onboardbase, we take security seriously. This is why we built a collaborative workspace for web developers to securely store website credentials like database passwords or SSH keys. But what good is a secret vault if you don’t know where to look to protect your website in the first place? In the following article, we give you a simple checklist to perform your own website security audit without complex tools and services. Hope you enjoy it!
What Is A Website Security Audit
A website security audit runs your website against predetermined tests with the intention to expose potential attack vectors.
These tests can be performed using software tools or manually by a cybersecurity expert. A website security audit typically costs thousands of dollars if it is outsourced to a specialized security consulting firm, while some pentest tools are available for free at the expense of reduced audit scope. This article gives you an overview of what you should watch out for to perform a basic website security audit, and how to perform it yourself with little complexity overhead.
Why A Website Security Audit
Website security audits allow you to Identify security threats and data breaches. Learning to protect your online business is key because security breaches are commonplace: in fact, 37% of engineers have encountered a security breach in their career, and 26% of all breaches originate from web-based attacks so securing your website is a priority.
A website security audit can also be mandatory to meet security standards like GDPR compliance and to ensure service-level agreements related to security like end-to-end encryption. If you collect emails for your newsletter, for example, you have to make sure your security audit covers how your data is stored and your database credentials are secured.
How To Perform A Website Security Audit
1. Update Your Software
55.9% of WordPress webmasters declare plugin vulnerabilities as the origin of a security breach they personally experienced. Websites―whether you use Wordpress, another CMS, or a custom solution―interact with third-party software providers, and it is important to remember to update these plugins, integrations, and extensions to keep the overall software architecture secure.
The same goes with code libraries and packages. In Javascript, for example, you can use the following package manager commands to check if there is any update available and perform them:
npm outdated # check if any installed package is outdated
npm update # update all installed packages
2. Implement Basic Penetration Tests
Pen testing consists in simulating attacks to better protect software products. On a website, you basically want to look for vulnerabilities around all possible client-facing doorways to your web server: forms, APIs, administration dashboards, etc.
Let’s take forms for example. SQL injections and XSS attacks are some of the most common security threats that unprotected forms bring. We use forms for many things: to log in your administration dashboard, to subscribe to an email list, to perform a search query, etc. A penetration test could consist of typing harmful values in form fields and seeing how the client and server react. In Javascript, you can do this in an automated way with a library like Puppeteer:
const puppeteer = require("puppeteer");

test("Check for XSS attack on an email field", async () => {
  const browser = await puppeteer.launch();
  try {
    const page = await browser.newPage();
	  const js_command = "alert('test XSS injection')"
    await page.goto("http://localhost:8000");

    await page.type("#email-field", js_command);

    let input_value = await page.$("#error-display");
    let value = await input_value.evaluate((el) => el.textContent);

	  // an error should be triggered since the input value isn't an email
    expect(value.length).toBeGreaterThan(0);
  } finally {
    await browser.close();
  }
}, 120000);
3. Check for API Vulnerabilities
It is quite common nowadays to have frameworks like NextJS that generate the website at build time and let APIs handle the rest at runtime. The attack surface is greatly reduced this way since you only need a static web server to output HTML and Javascript to perform authenticated calls to external web services. Even WordPress now proposes this headless CMS option to leverage all its pros. In this situation, penetration testing your APIs becomes as important. More specifically, you want to go through the following checklist:
- Validate user input - whether it is the server or client-side, you need to make sure all data types and formats are correct before processing them
- Set up CORS policies - restrict the domains that can use your API to drastically reduce your attack surface using CORS policies
- Implement rate-limiting - prevent abusive API use by limiting the number of API requests that can be performed by a single user in a given amount of time
- Add unit and functional testing - test your back-end logic to make sure invalid user input will trigger appropriate error handlers
If you want to learn more about API security best practices with code examples, we have a dedicated article on the subject.
4. Automatic backups
The Heartbleed vulnerability which exposed hundreds of thousands of web servers back in 2014 showed that no matter how confident you think you are about your infrastructure, security breaches can happen and you need to prepare for the worst. In this regard, automatic backups are essential to recovering from an incident without losing customer data.
While most admin dashboards allow you to directly perform backups on a regular basis, a more custom solution can also be implemented with cron jobs. With a MySQL database, for example, you can just program your web server to run the following mysqldump command to save your database as a file:
mysqldump -u [user name] –p [password] [options] [database_name] [tablename] > [dumpfilename.sql]It’s important to keep your database encrypted to prevent data leaks and to store your encryption key in a secure vault to keep the encryption password confidential.
5. DoS prevention
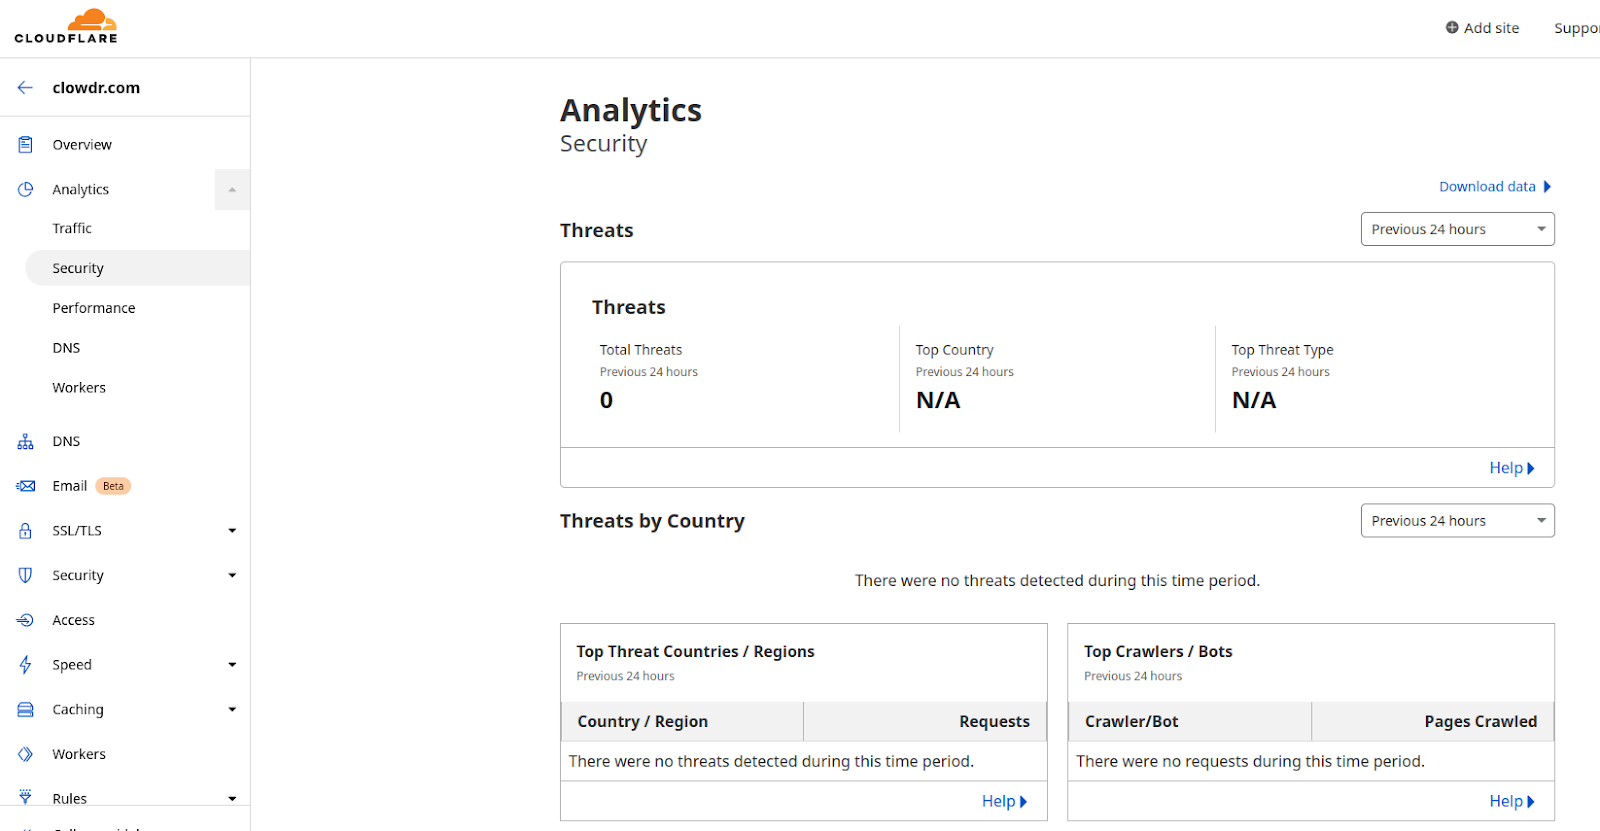
Denial of Service (DoS) attacks are also commonplace nowadays―91,052 DDoS (distributed DoS) attacks were blocked by Kaspersky during the first quarter of 2022, so the total number of DoS attacks is much larger. DoS prevention is key and you need to check for vulnerabilities.
Cloudflare’s content delivery network solution will remove most problems regarding this. A CDN is a global network of web servers that will balance the traffic load to your website to avoid bottlenecks. You can also use Cloudflare’s analytics to find crawlers and bots representing potential threats you can then ban by IP address blacklisting:
6. HTTP monitoring
You’ll also need to audit each individual webpage for server or client errors using HTTP monitoring.
HTTP errors not only indicate potential UX issues but also security threats. For example, an internal server error (error 500) could indicate a server crash caused by a bad request that attackers could leverage to cause a denial of service. You can go about HTTP monitoring in two ways: using programmed HTTP requests using a cron job or a service like Instatus, or by importing your web server logs in a log monitoring tool like Prometheus.
The former consists of sending predetermined HTTP requests to your website to test the return response. If an error occurs, you get notified by email.
The latter solution leverages the ability of web servers to monitor their HTTP traffic using log files. A log is simply a textual representation of an HTTP request, in Apache for example:
10.185.248.71 - - [09/Jan/2015:19:12:06 +0000] 808840 "GET /inventoryService/inventory/purchaseItem?userId=20253471&itemId=23434300 HTTP/1.1" 500 17 "-" "Apache-HttpClient/4.2.6 (java 1.5)"A log monitoring tool parses your server logs and organizes them in a readable manner so that you can audit your website for potential security threats.
Similarly, you want to enforce HTTPS on each and every page by redirecting HTTP requests to HTTPS. All web server technologies offer this feature, with Apache for example:
<VirtualHost *:80>
  ServerName onboardbase.com
  ServerAlias www.onboardbase.com

  Redirect permanent / https://onboardbase.com/
</VirtualHost>
7. Credentials & Auth
Assessing the security of your website credentials is key to preventing data leaks: password management, email validation, API authentication, and authorization … you need to make sure your website secrets are securely stored and cannot be brute-forced. Similarly, each user having access to your admin dashboard should have appropriate access rights.
A secure vault-like Onboardbase is perfect for any type of website―whether you use WordPress or a custom-built solution―because you can use its CLI to integrate secrets as environment variables in any type of workflow. Let’s say you serve a website using a NodeJS framework for example:
const express = require('express')

require('dotenv').config()
const DATABASE_USERNAME = process.env.DATABASE_USERNAME
const DATABASE_PASSWORD = process.env.DATABASE_PASSWORD

const app = express()
const port = 3000

app.get('/', (req, res) => {
  res.send(`My secrets: ${DATABASE_USERNAME} ${DATABASE_PASSWORD}`)
})

app.listen(port, () => {
  console.log(`Example app listening on port ${port}`)
})
Instead of writing a .env file on your server or manually defining environment variables yourself, you can use Onboardbase’s CLI to get started in three command lines.
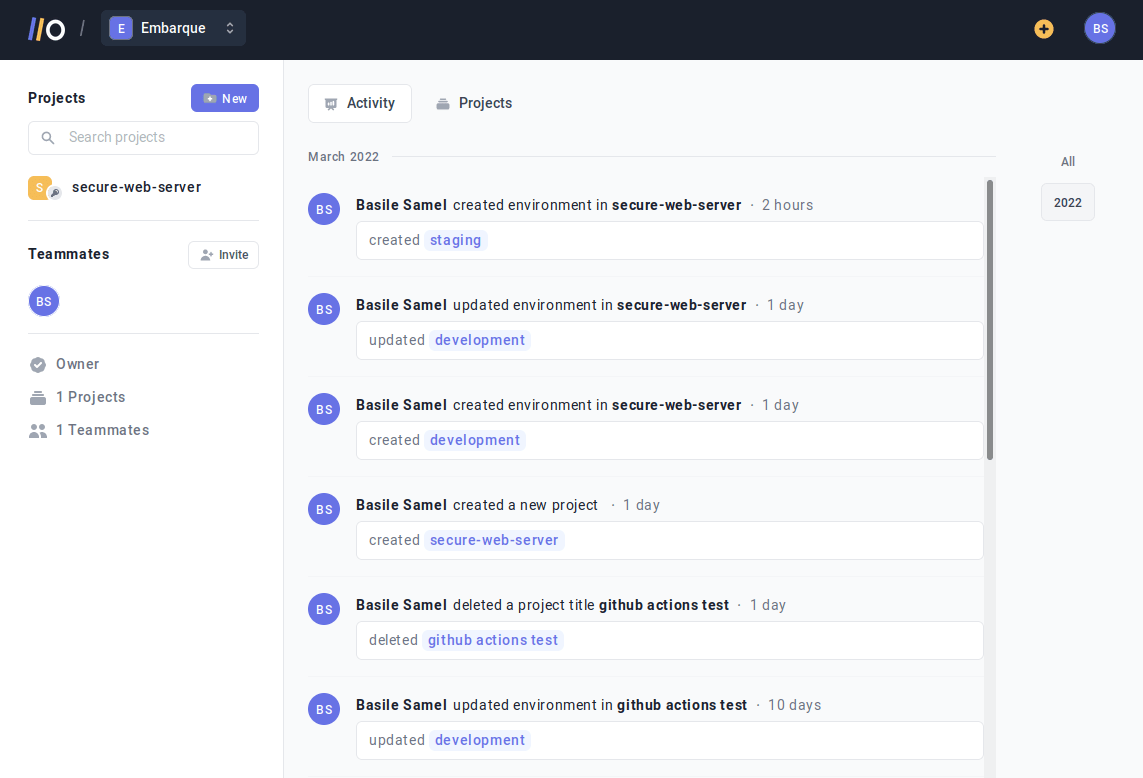
First, you create environment variables in your Onboardbase workspace. Each value is securely stored using AES-256 encryption:

You can set up Onboardbase in your NodeJS project by installing the onboardbase package:
npm i -g @onboardbase/cli@latest #install onboardbase as a npm package

onboardbase login #login to your remote workspace

onboardbase setup #setup your config file
Then you can change Onboardbase’s configuration file to match your remote workspace:
setup:
  project: secure-web-server
  environment: development
Finally, all it takes to inject environment variables at runtime is to wrap your server start command with Onboardbase’s run command:
onboardbase run --command="node ./server.js"Congratulations, your credentials are now securely integrated into your web server. You can do the same with your SSH keys, API keys, etc.
8. Web server configuration
Last but not least, you need to ensure your web server is correctly configured with the right root folder, forced HTTPS enabled, and appropriate file permissions.
Let’s take image hotlinking as an example. When you display an image on your website using HTML, you are requesting it from your web server. Hotlinking consists in leveraging the same mechanism to display images hosted on an external server on another website. Hotlinking becomes a security threat when the external website abuses this and floods your web server with image requests. This file permission problem can easily be fixed with an appropriate server configuration, with a Caddy server for example:
https://onboardbase.com {
	root   /var/www/onboardbase-website/
	rewrite {
		if {>Referer} not ""
		if {>Referer} not "https://onboardbase.com"
		to /hotlink
	}
	status 403 /hotlink
}
This configuration will return a 403 Forbidden error when external websites try to link to your static assets, including images.
The same principle applies to all files on your web server: you need to check all directory and file access rights and reduce them to the bare minimum. A good website security audit will investigate the chosen web server’s documentation for best practices―whether it’s Caddy, Nginx, or Apache.
You can read more on web server security in our dedicated article on the topic.
Use Onboardbase To Protect Your Website Secrets
Website credential management is a big part of a website security audit. Storing your database login or your Github access token in a .txt file just cannot cut it when your livelihood depends on the security of your customers: you need a secure vault to store these sensitive pieces of information in one centralized place.
Onboardbase is unlike any other password management solution though. We focus on great developer experience to make it as simple as possible to secure websites. Our web-based dashboard makes it easy to encrypt and share app credentials with your teammates, without needing to write a single line of code. At build time or during runtime, Onboardbase offers a CLI to inject website secrets as environment variables in a single command in any workflow or programming framework.
Get started for free and rest assured you’ll never leak credentials ever again!
Subscribe to our newsletter
The latest news, articles, features and resources of Onboardbase, sent to your inbox weekly